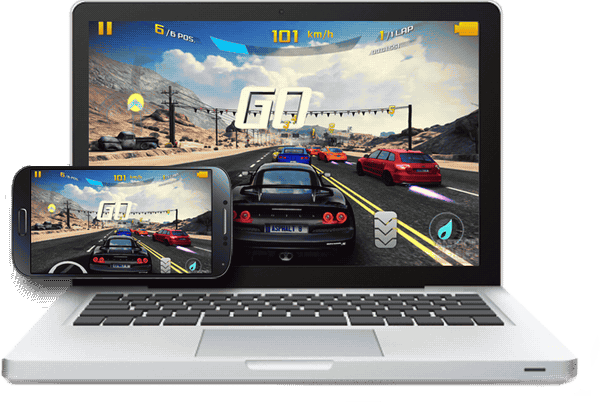
Downloading Subway Surfers for PC - please stand by...
If your file doesn't automatically download, please click here.
Instructions
Minimum System Requirements:
- Intel Core-i5 3rd generation
- Windows XP SP3 / 7 / 8 / 8.1 / 10
- DirectX 11 / Graphic driver w/ OpenGL 2.0
- Hardware Virtualization Technology (Intel VT-x/AMD-V)
- 2GB of system memory
- 2GB of available hard disk space
Optimal System Requirements:
- CPU: Intel Core-i5 4th generation and higher
- RAM: 8GB or more
- GPU: 2GB or more
- OS: Windows 10
After your file has completed downloading, double click to run the setup file.

NOTE: If you get an online installer, please make sure you have the internet access during the installation.
There are two ways to install games or apps in Deskify App Player:
- 1. Start Deskify App Player, open Deskify Market or Google Play Store, search for the games or apps you want and click Install.
![]()
![]()
- 2. Another way, download the APK file of the game or app to your PC, click the APK button on the side bar and select the APK file from Windows to install.
![]()
![]()


If you want to sync any game or app from Deskify to your phone, please follow the steps as below:
- 1. Enter into a certain application in the Deskify and click the Install button on the side bar.
![]()
![]()
- 2. Enable the USB Debugging Mode of your phone and connect it to PC through a USB cable. Accept the connection when the confirmation window pops up in your phone.
![]()
- 3. Confirm to install the current application to your phone by Clicking the OK button.
![]()
- 4. Then the current application will be installed to your phone very quickly.
![]()


Click the Settings button on the side bar and go to the General setting page. There are three frequently-used values in the drop-down box of Resolution. You can also change your resolution preference as you want in Custom Resolution Box. Do not forget, click Save and restart Deskify to apply change.


Click the Settings button on the side bar and go to the General setting page. You can set CPU core number and memory size as needed. Please note that the values shall not exceed the upper limit of the PC you have and also make sure Windows has enough memory to function properly. Do not forget, click Save and restart Deskify to apply change.

Click the Settings button on the side bar and go to the Advanced setting page. You can set phone brand and model as you want. Do not forget, click Save and restart Deskify to apply change.

Click the Settings button on the side bar and go to the Advanced setting page. You can check virtual keyboard box, click Save and restart Deskify to apply change.

With this function, you can enter character without physical keyboard. It’s very useful for Windows tablet device.

Click the Settings button on the side bar and go to the GPS setting page. You can set the map engine, then drag the map and click the place where you want to locate yourself, or search the destination in the Search field. Once located yourself to the desired place, click Save Location, otherwise your setting won’t take effect.

Click the Settings button on the side bar and go to the Shared setting page. There are four different shared folders of Music, Video, Picture and Download. You set them respectively to share data between Deskify and Windows.

Once you copied files to the shard folder in Windows, click the ES icon in the home page of Deskify and then you can see the files in the corresponding library, like Images. As you can see, all the screenshots are saved there too.


In fact, you can also get these files in the corresponding directory, like /sdcard/Pictures.

Click the Rotate button on the side bar to switch the orientation between landscape and portrait. Please note that Deskify App Player will adjust the orientation automatically because application may require a certain orientation.

Click the ScreenShot button on the side bar to take a snapshot of your phone screen. The PNG screenshots file will be automatically saved in your picture library. Also you can get it from your shared folder in Windows.

Click the Shake button on the side bar to simulate the physical shake action of your phone. This is a common function of smartphone and many apps use it as input gesture.

Scroll the mouse wheel while holding down the Ctrl key. It exactly simulates the behavior of zoom in and out. In addition, you can also try with F2 or F3.

Click the Keyboard button on the side bar after you enter into a certain game.

You may follow below steps to setup keyboard mapping for easy control.
- Drag the WASD key to the place where the movement key spot locates on the screen.
![]()
- Drag the Select & Attack key to the place where the attack key spot locates on the screen. As the name suggests, it acts as a combination of select and attack through right click your mouse. It’s normally applied in ARPG game.
![]()
![]()
- Drag the Shoot key to the place where the shoot key spot locates on the screen.
![]()
Drag the Shoot Perspective key to the place where the front sight spot locates. As the name suggests, Shoot and Shoot Perspective keys are normally applied in shooting game. Once saved, right click mouse to activate them in the game.
![]()
![]()
- For accelerometer control, click the Gravity key and assign key to the direction of tilt.
![]()
There are four directions supported and you may map them as needed.
- For slide screen operation, hold the left mouse button down and drag the mouse pointer toward the direction of slide screen, then assign a key to map this operation. By the way, WASD key functions identically as slide operation in running games.
![]()
![]()
- Note: When you want to type message in the game, click the switch on the top left corner or press shortcuts “Alt + A” to avoid keyboard occupation temporarily.
![]()
Note: You can also get help info about keyboard mapping in the Deskify by clicking the Help key.
![]()


In addition to keyboard, you can control your character with joystick easily. Please follow below steps to setup joystick mapping.
- 1. Connect the joystick to your PC and open the properties of this device.
![]()
![]()
![]()
- 2. Press the buttons of joystick and make sure they response properly in the properties page.
![]()
- 3. Download JoyToKey_en.zip, unzip it and open JoyToKey.exe with administrator privileges. Press the buttons of joystick and make sure they response properly in the Joystick 1 tab.
![]()
- 4. Enter into a certain game and set keyboard mapping as usual.
![]()
- 5. Assign the buttons of joystick to the keyboard mapping accordingly one by one.
![]()
![]()
- 6. Save the assignments at the end.
![]()
- Note: You can also map mouse operations with joystick if you want. The only difference is in step 5, assign the buttons of joystick to the mouse operations.
![]()
- Note: Please make sure you launch JoyToKey.exe with administrator privileges.


Click the Cleanup button on the side bar to kill all background processes in the Android to reclaim memory. You may try to speed up Deskify through this function whenever necessary.
